When it comes to low-volume manufacturing of metal parts, 3D metal printing is proving to be a paradigm shifting technology. Without a doubt, metal additive manufacturing will be the single largest boon for low/medium-volume manufacturing the world has ever seen.
There is a lot of buzz around the technology, and rightfully so. However, it has limitations that need to be well-understood by engineers. It’s important to have a deep understanding of the process before designing for it. The purpose of this article is to offer a few tips and tricks that can help engineers just starting out on this journey.
Primary Metal Printing Methods
At present, the three most common methods of 3D metal printing are direct energy deposition (DED), powder bed fusion, and binder. Each has its nuances and has found its own niche in the market. 3D printing in metal is much more complex than plastic. Given its intricacies, printing metal parts will likely always be conducted in a manufacturer setting due to volume, repeatable, and safety concerns.
Each of these techniques can be used to great effect. However, metal printing in general is widely misunderstood due to the lack of design-for-manufacturing knowledge.
DED sends a spray of powdered metal through a nozzle. The tightly focused “beam” of powder is struck by a laser which fuses the powder into a solid at the point of deposition. This can also be done using metal wire, but metal powder is more common. Being an additive process, deposits are laid down layer by layer to build the desired part. DED is suitable for quickly printing large, low-fidelity parts. It can also be used for spot-repairing components.
Powder bed fusion is perhaps the most popular metal printing process. It includes direct metal laser melting (DMLM), which uses a powder bed and a laser that melts and fuses those powders into layers on a build platform. This is a slower process than DED and requires more careful design, but generally result in stronger, more-durable parts.
Binder jetting is unusual in that it works with sand and ceramic powders as well as metal powder. This process sprays a liquid binding resin directly on the powdered material. The resin solidifies the powder to create the desired part. It’s fast, relatively cost-effective, and can be used to create large structures. It is important to note that this process is not suited for engineering applications because without additional post-processing, binder jetted parts have low densities and strengths. Post-processing adds to production time and costs, but some post processing—such as curing and infiltration—is done to some industrial-grade materials to improve the density and strength of the binder jetted part.
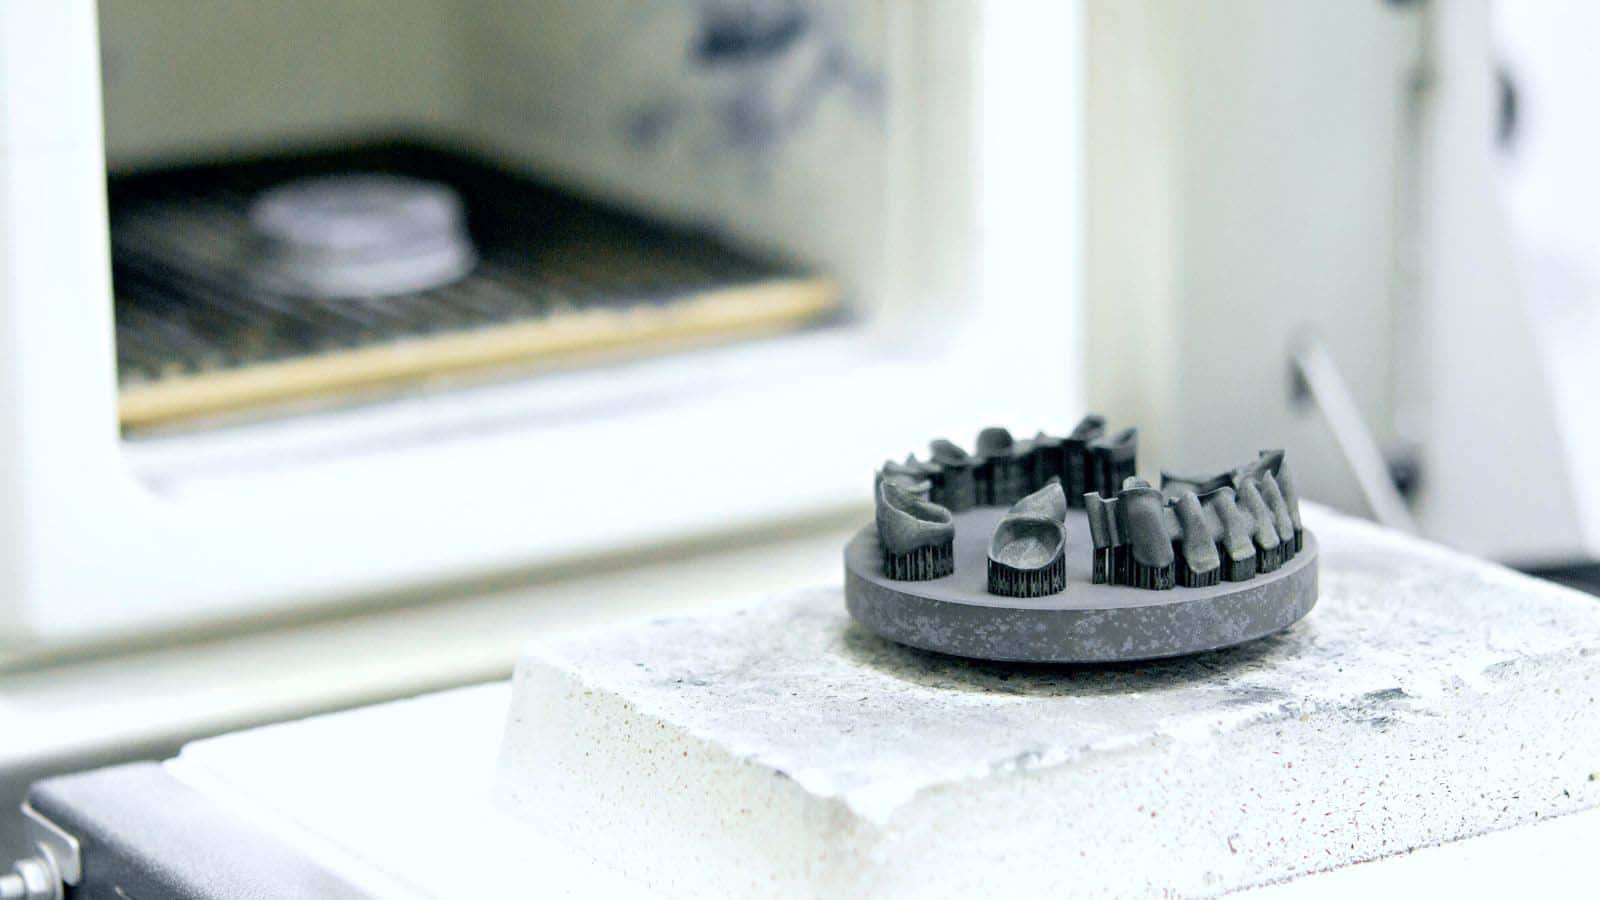
3DEO’s process is unique in the binder process, in that it’s machine binds the entire layer of metal powder, and a CNC micro end mill is then used to define the part geometry. The benefit of this process is that it is very repeatable and low cost. In fact, 3DEO boasts the lowest cost parts in the industry.
Tips for Designing for Metal 3D Printing
With metal printing, there is a fair amount of trial and error and iterating on a design that goes into developing the best process. However, there are some common design pitfalls that can be avoided to streamline the process. It’s important for designers to have a particular metal AM process in mind when creating the CAD model. Different 3D metal printers have different limitations due to the laser spot size and melt pool. Despite this, there are some general guidelines that should be followed when designing parts for metal printing:
Wall thicknesses
Walls that are too thin will begin to collapse under their own weight. While this is very geometry dependent, walls should be no thinner than 0.5 mm.
Holes and gaps
The limitations for gaps and holes may vary widely based on the metal 3D printing process being used, the metals being used, and part geometry. The general rule of thumb is to not design a gap or hole under 0.5 mm. Smaller gaps run the risk of the sides merging together and filling the empty space. On the other hand, supports need to be added for certain processes (DED and powder bed fusion) for holes greater than 10mm.
Overhangs
0.5 mm is the maximum length that should be used for an overhang, and all downward facing structures need to be designed with more than a 45-degree angle, with a concave or convex shape so the part can support itself. Support structures need to be included in the part’s design to exceed these guidelines.
Support generation
Supports are needed for two reasons. The first is to hold parts to the substrate plate. The second is for heat dissipation. Any areas below 45 deg. from horizontal need supports added. This applies to most of the metals. However, there are exceptions. Ti64 (an alpha-beta titanium alloy) parts can have walls angled be as low as 30 deg. without supports.
Part orientation
Unlike other manufacturing processes, most 3D printing creates parts with anisotropic properties, which means they have different mechanical properties in different build directions. In the X and Y directions, for example, parts have higher tensile strength than they do in the Z direction. Hence, part orientation needs to be considered prior to printing. This is especially true if parts are for mechanical/structural purposes where a certain area will sustain some degree of pressure and stress.
There is also an aesthetic element to part orientation. Downfacing surface areas of printed parts will have a poorer surface finish compared to the top-facing surfaces. If certain areas of a part need better surface finishes, it should be taken into consideration during part orientation. For complex parts, it is important that part orientation is such that if there are supports that may affect part function, they can be removed.
Benefits of 3DEO’s Process
3DEO’s process is unique in that we are able to avoid a lot of these design limitations. Our surface finish is the best in metal 3D printing so this gives more flexibility on part orientation. We bulk sinter, which gives our parts isotropic properties in the X, Y, and Z directions. We build in a powder bed, so support structures are not needed in our build process. Feel free to reach out to us if you’d like to discuss your design.
Request Your Sample Parts Today
See and feel the future with our 3D printed sample parts.